Authentic Dhaba-Style Mutton Curry (Straight from India’s Highways!)
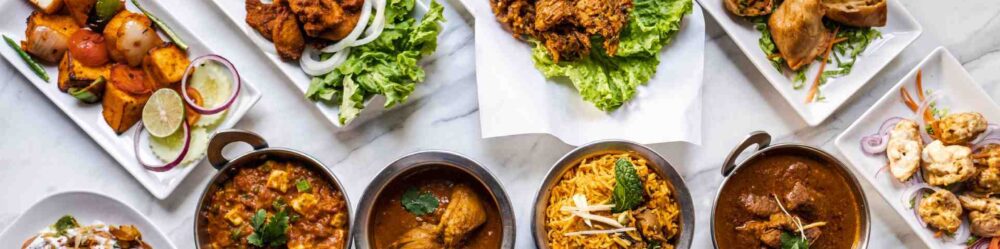
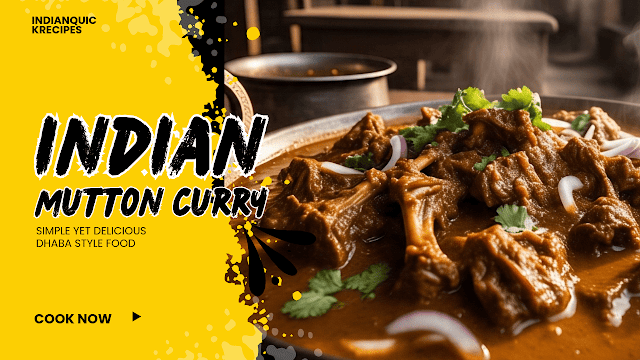
Desi dhaba-style mutton curry served with tandoori roti and sliced onions
If you’ve ever taken a long drive on India’s highways, you know there’s one thing that makes the journey unforgettable — the food at those smoky roadside dhabas. And right up there on the menu is the spicy, rich, and rustic mutton curry — the kind that warms your soul, fogs your glasses, and leaves your fingers deliciously stained.
Good news? You don’t have to wait for the next road trip to relive that flavor. This recipe brings real dhaba-style mutton curry to your home kitchen — no shortcuts, no butter overload — just good old slow-cooked magic.
⭐ Why This Recipe Works
Packed with layered flavors from real spices
No cream or cashew — just honest heat and masala
Uses mustard oil for that unmistakable dhaba edge
Weekend-worthy but simple enough for regular meals
Authentic Dhaba-Style Mutton Curry is a rich, rustic Indian goat curry inspired by the smoky roadside dhabas found along India's highways. Made with bone-in mutton, yogurt, mustard oil, caramelized onions, and aromatic spices, this slow-cooked curry delivers bold flavors and tender meat that pair beautifully with tandoori roti or rice.
In a large bowl, combine mutton, yogurt, ginger-garlic paste, turmeric powder, and salt. Mix well and let it rest for at least 1 hour. For deeper flavor, marinate overnight in the refrigerator.
Step 2: Prepare the Masala Base
Heat mustard oil in a heavy-bottomed pan until it reaches smoking point. Reduce the heat and add cumin seeds, bay leaf, black cardamom, cloves, cinnamon stick, and dried red chilies. Allow the spices to release their aroma.
Step 3: Cook the Onions
Add sliced onions and sauté over medium heat until they become deeply golden brown and caramelized. This forms the foundation of the curry.
Step 4: Add Tomatoes and Ground Spices
Add chopped tomatoes, coriander powder, red chili powder, and a little salt. Cook until the tomatoes soften and the oil begins separating from the masala.
Step 5: Bhuno the Mutton
Add the marinated mutton to the pan. Cook on medium-high heat for 15–20 minutes, stirring frequently, until the meat is well coated and the masala starts caramelizing.
Step 6: Slow Cook Until Tender
Pour in about 2 cups of hot water. Cover and cook on low heat for 45–60 minutes, stirring occasionally, until the mutton becomes tender and the gravy thickens.
Optional Pressure Cooker Method:
Transfer everything to a pressure cooker after bhunoing. Add hot water and cook for 3–4 whistles. Allow the pressure to release naturally and simmer uncovered if needed.
Step 7: Finish and Serve
Sprinkle garam masala over the curry and garnish with chopped coriander leaves. Allow the curry to rest for 5 minutes before serving.
Notes
Bone-in mutton gives the richest flavor and is highly recommended.Mustard oil provides the authentic dhaba taste. Heat it until smoking to remove its raw flavor.The longer the onions are caramelized, the deeper and richer the gravy becomes.Bhunoing the mutton for 15–20 minutes develops concentrated flavors and should not be rushed.This curry tastes even better the next day after the spices have had time to mature.Serve with tandoori roti, rumali roti, steamed rice, jeera rice, sliced onions, and green chutney.Leftovers can be refrigerated for up to 3 days and reheated gently over low heat.
🔪 Instructions – Step by Step
Step 1: Marinate the Mutton
In a large bowl, mix the mutton with yogurt, ginger-garlic paste, turmeric, and salt. Let it rest for at least 1 hour (overnight is even better).
👉 Pro Tip: Add a splash of mustard oil for that roadside dhaba taste.
Step 2: Build That Masala Base
Heat mustard oil in a thick pan until it starts to smoke. Lower the heat and add whole spices: bay leaf, cardamom, cloves, and cinnamon. Then toss in the sliced onions and sauté until golden brown and caramelized.
📝 This is where the magic begins. Don’t rush this step.
Step 3: Masala Time
Add chopped tomatoes, red chilies, salt, and ground spices (except garam masala). Cook until the oil starts separating from the masala — it should look deep red and thick.
Step 4: Introduce the Mutton
Now add the marinated mutton. Turn the heat to medium-high and bhuno it well — this means cooking until the mutton is coated in the masala and it starts to caramelize slightly. This takes 15–20 minutes, so stir and be patient!
Step 5: Simmer It Down
Add about 2 cups of hot water, cover, and let it cook on low heat for 45–60 minutes, or until the meat is fork-tender. Stir every 10 minutes.
🔥 Short on time? Use a pressure cooker: 3–4 whistles on medium heat, then simmer uncovered to thicken the gravy.
Step 6: Finishing Touch
Sprinkle garam masala, chopped coriander, and give it a final stir. Let it rest for 5 minutes before serving.
Ready to take your spice game to the next level? This fiery Andhra Mutton Curry won’t disappoint.
🍳 Chef Tips for Next-Level Results
Use bone-in mutton for deep, meaty flavor.
Caramelize those onions well — that’s your gravy’s backbone.
Mustard oil is your best friend in this recipe.
Bhuno is everything. It develops the rich, concentrated masala.
Reheat gently to avoid overcooking the meat.
🧮 Nutrition Facts (Approx. per serving)
Nutrient
Amount
Calories
~420
Protein
28g
Carbohydrates
14g
Fats
30g
🏁 Final Thoughts
This classic dhaba mutton curry is the kind of dish that turns a meal into a memory. Deep flavors, fiery masala, and tender meat — it’s everything a meat lover dreams of. Whether you’re recreating highway nostalgia or serving guests something bold and flavorful, this one’s a guaranteed winner.
Pro move? Eat it with your hands, seated cross-legged — the true dhaba way.
If you already know how to marinate and cook these stunning Tandoori Mutton Ribs at home. But let’s go deeper—because perfect ribs aren’t just about spice. It’s about timing, texture, and tiny tricks that make a huge difference.
Let’s explore what happens after cooking—serving, plating, tips, and even some backstory about how these ribs became the showstoppers they are.
⏱️ Preparation & Cooking Time
Task
Duration
Cleaning & prepping ribs
15 minutes
First marination
30 minutes
Second marination
6–8 hours (or overnight)
Cooking (oven or grill)
25–30 minutes
Optional charring/broiling
5 minutes
Total Time
~7–9 hours (mostly passive)
Ingredient Substitutions & Tips
Sometimes, you may not have the exact ingredients. No worries—here’s how to adjust:
Hung curd substitute: Use Greek yogurt. Just strain regular curd if needed.
Roasted gram flour (besan): Dry-roast some chickpea flour in a pan for 2–3 mins.
Kashmiri red chili: Can’t find it? Use smoked paprika for color, and regular chili for heat.
Kasuri methi (dry fenugreek): Optional, but adds authentic aroma. You can skip it or use celery leaves in a pinch.
Lemon juice: White vinegar works too.
✅ Pro Tip: Avoid watery curd. It makes the marinade slide off instead of sticking.
🧑🍳 Final Steps – Let’s Finish It Like a Pro!
Your ribs are now cooked—juicy on the inside, crusty on the outside. Let’s not stop here. A few finishing touches can elevate them to restaurant standard:
🔥 Butter Baste + Chaat Masala
Right before serving, brush the ribs lightly with melted butter and sprinkle a pinch of chaat masala. It adds richness, shine, and a tangy edge.
🌬️ Optional Smoke Infusion (Dhungar Technique)
If you want that authentic smoky tandoor aroma:
Heat a small piece of charcoal over a flame till red hot.
Place it in a small steel bowl.
Put the bowl in the center of the ribs tray.
Add a drop of ghee on the coal and immediately cover the tray with foil or a lid.
Let it smoke for 3 minutes.
That’s it. Your kitchen smells like a Mughlai restaurant.
Serving Like a Star
These ribs deserve to be plated with flair. Here’s how to serve them:
⭐ Classic Pairings:
Mint chutney – The freshness balances the spice.
Pickled onions – Add crunch and acidity.
Lemon wedges – For a final zing.
Butter naan – Or roomali roti for that authentic North Indian feel.
Side salad – Cucumber, onion, and tomato tossed with chaat masala.
🍺 Beverages That Work:
Chilled beer – Light lagers work best.
Lassi – Sweet or salty, both are perfect with spicy ribs.
Masala soda – Refreshing and desi.
🧠 Smart Serving Tips
Slice ribs before serving – Makes them easy to grab and eat.
Serve hot – Reheating dries them out.
Use foil trays if serving outdoors or at parties—less mess, more enjoyment.
❓ FAQ – Got Questions?
❓ Can I air-fry these ribs?
Yes! Preheat your air fryer to 180°C. Cook for 18–20 minutes, flipping halfway. You won’t get deep char, but the inside stays juicy.
❓ How to reheat leftovers?
Wrap ribs in foil and heat in the oven at 150°C for 10 minutes. Avoid the microwave—it makes them rubbery.
❓ Can I freeze them?
Yes. After cooking and cooling, wrap tightly in foil and freeze. Reheat in an oven (do not microwave).
❓ Can I use chicken instead?
Absolutely. Use drumsticks or thighs. Reduce marination to 4 hours, and cooking time to 18–20 minutes in oven/grill.
Final Thoughts
These Tandoori Mutton Ribs are a celebration of bold flavor, slow cooking, and classic Indian spices. You don’t need a fancy setup to create magic. A little patience, the right marination, and some heat—that’s all it takes.
Whether it’s a weekend cookout or a dinner party, these ribs will always steal the show.
Tandoori cooking has deep roots in Mughlai cuisine, with origins tracing back to ancient Punjab. The word “Tandoor” refers to a cylindrical clay oven used in traditional Indian and Pakistani cooking.
Tandoori meats gained global fame in the mid-20th century when Indian restaurants started adapting the technique for chicken and lamb. What started with Tandoori Chicken evolved into ribs, kebabs, and even seafood.
The spice blend, smoky crust, and tender meat quickly became iconic. Today, from the streets of Delhi to kitchens around the world, Tandoori Mutton Ribs represent the bold, fiery spirit of Indian cuisine.
❤️ Enjoyed this recipe?
👉 Share it with your foodie friends
👉 Leave a comment below with your twist on the ribs
👉 Follow for more restaurant-style Indian recipes made simple