

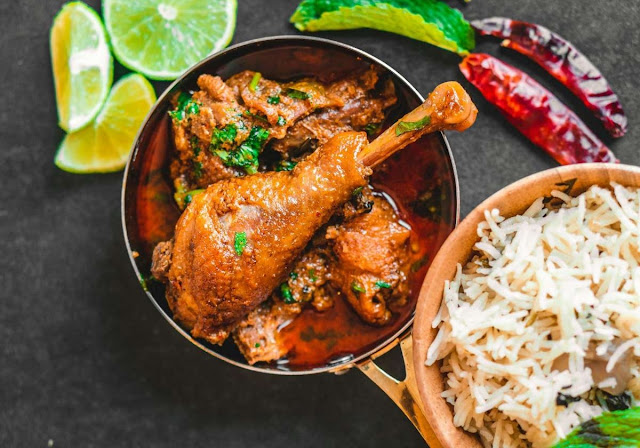
📋 Quick Recipe Summary
| Details | Information |
|---|---|
| Prep Time | 15 minutes (plus 1–12 hours marination) |
| Cook Time | 45–90 minutes |
| Total Time | 1–2 hours |
| Servings | 4–6 |
| Difficulty | Easy to Intermediate |
| Best Cut | Bone-in shoulder or ribs |
| Cooking Method | Pressure cooker, slow cooker, or heavy-bottom pot |
| Cuisine | Indian |
| Best Served With | Steamed rice, jeera rice, roti, naan, or paratha |

🔑 Key Takeaways
Before you start cooking, keep these simple tips in mind:
- Choose bone-in shoulder or rib cuts for the most tender curry.
- Marinate the mutton for at least 1 hour, or overnight for the best flavor.
- Cook on low heat or use a pressure cooker correctly—don’t rush the process.
- If the meat is still tough, cook it a little longer instead of increasing the flame.
- Let the curry rest for 10–15 minutes before serving so the flavors blend beautifully.
The Real Reason Your Mutton Turns Hard — And How to Fix It

If you have ever cooked mutton curry and felt disappointed… you are not alone.
You followed the recipe.
You added all the spices.
You pressure cooked it.
But the meat turned chewy. Hard. Dry.
And you kept wondering:
Why is my mutton curry hard?
I used to struggle with the same problem. I thought cooking longer would fix it. Sometimes it did. Sometimes it made things worse.
Today, I’m going to explain something most recipe blogs don’t.
Not just steps.
Not just ingredients.
But the science behind tender mutton.
By the end of this guide, you will understand:
- Why mutton becomes hard
- How to cook tender mutton curry every time
- Best cuts of mutton for curry
- Exact cooking temperature & time guide
- How to make mutton soft and juicy in pressure cooker
Let’s fix this properly.
🥗 Nutrition Information (Approximate Per Serving)
| Nutrient | Amount |
|---|---|
| Calories | 420 kcal |
| Protein | 30 g |
| Carbohydrates | 9 g |
| Fat | 29 g |
| Saturated Fat | 10 g |
| Fiber | 2 g |
| Sodium | 620 mg |
Nutrition values are approximate and may vary depending on the ingredients used.
1️⃣ Why Does Mutton Become Hard?
This is the biggest mistake people make.
They think mutton is like chicken.
It’s not.
Mutton comes from an older animal (usually goat or sheep). The muscles are stronger. That means more connective tissue.
And that connective tissue contains something called collagen.
When you cook mutton the wrong way:
- Collagen tightens
- Muscle fibers shrink
- Moisture escapes
Result? Chewy mutton.
But here’s the interesting part…
Collagen is not your enemy.
If cooked correctly, collagen melts into gelatin.
And that gelatin makes the curry rich, silky, and soft.
So the real question is not:
“Why is my mutton hard?”
The real question is:
“Did I cook it long enough at the right temperature for collagen to break down?”
2️⃣ Understanding Mutton Cooking Science (Very Important)
Let’s simplify this.
Why Mutton Becomes Chewy After Cooking
Mutton becomes chewy when:
- It is cooked too fast on high heat
- It is undercooked
- It is cooked at the wrong temperature range
Here’s what happens internally:
At around 60–70°C
→ Muscle fibers tighten.
At around 70–80°C
→ Collagen begins to shrink.
At 90–95°C (slow cooking range)
→ Collagen slowly breaks down into gelatin.
That is why slow cooking works.
That is why pressure cooking works.
That is why fast frying does NOT work for curry cuts.
Pro Tip: A gentle simmer gives much better results than a rapid boil.
🌡️ Mutton Cooking Temperature Guide
| Temperature | What Happens |
|---|---|
| 60–70°C (140–158°F) | Muscle fibers begin to tighten. |
| 70–80°C (158–176°F) | Connective tissue starts shrinking. |
| 90–95°C (194–203°F) | Collagen breaks down into gelatin, making the meat tender and the gravy rich. |
Mutton Cooking Temperature Guide
For tender curry:
- Ideal internal temperature: 90–95°C slow cooking zone
- Gentle simmer, not aggressive boiling
- Low flame after first boil
If you cook mutton on very high heat, water evaporates quickly, meat tightens, and you get rubbery texture.
This is where most beginners go wrong.
They think:
“Higher heat = faster cooking.”
For mutton, that logic fails.
Low and steady wins.
 |
| Slow-cooked mutton curry with aromatic spices, served with fresh roti and onions. |
⏱️ Mutton Cooking Time Guide
| Cooking Method | Approximate Time |
|---|---|
| Pressure Cooker | 4–6 whistles for tender goat meat, 6–8 whistles for older mutton |
| Heavy-Bottom Pot | 60–90 minutes |
| Dutch Oven | 75–100 minutes |
| Slow Cooker | 6–8 hours on Low |
Cooking time may vary depending on the cut, age of the animal, and size of the meat pieces.
3️⃣ Best Cuts of Mutton for Curry
Choosing the right cut makes 50% difference.
Let’s break it down.
Shoulder (Best Overall)
- Good fat content
- Balanced muscle + connective tissue
- Becomes soft and juicy
Best choice for beginners.
Leg
- Leaner
- Slightly firmer texture
- Needs longer cooking
Works well in pressure cooker.
Ribs
- More fat
- Deep flavor
- Excellent for slow cooking
Perfect for rich, dhaba-style curry.
Bone-In vs Boneless
Bone-in mutton:
- More flavor
- More gelatin
- Better texture in curry
Boneless:
- Cooks slightly faster
- Easier to eat
- Slightly less rich gravy
For soft curry?
Bone-in shoulder pieces are ideal.
How to Choose Fresh Mutton for Cooking
When buying:
- Color should be bright red (not dull brown)
- Fat should be white, not yellow
- Meat should feel firm, not sticky
- No strong smell
Fresh quality matters.
Old meat takes longer to soften.
4️⃣ How to Make Mutton Soft and Juicy
Now comes the practical part.
Proper Mutton Marination Tips for Curry
Marination helps, but only if done correctly.
Basic marinade:
- Yogurt
- Ginger-garlic paste
- Salt
- Turmeric
Marinate minimum 1 hour.
Overnight is better (refrigerated).
Yogurt contains mild acid.
It slowly loosens muscle fibers.
Acid vs Enzyme Tenderizing
Acid (yogurt, lemon):
- Works slowly
- Safe
- Good for curry
Enzymes (raw papaya paste):
- Very powerful
- Breaks protein fast
- Use very little (¼ teaspoon)
Too much papaya can turn meat mushy.
Salt Timing Secret
Many people add too much salt early.
Salt draws moisture out initially.
Best method:
- Add small amount during marination
- Adjust final salt after pressure cooking
This keeps meat juicy.
5️⃣ How Long to Cook Mutton in Pressure Cooker
This is the most asking question.
Here is the correct pressure cooker method.
Step-by-Step Pressure Cooker Mutton Curry (Beginner Friendly)
Step 1: Heat Oil Properly
Heat oil on medium.
Oil should be hot but not smoking.
If oil is cold, onions absorb oil.
If oil is too hot, spices burn.
Step 2: Brown Onions Slowly
Add sliced onions.
Cook on medium flame.
Do not rush this step.
Golden brown onions build flavor and help thicken gravy.
This is where restaurant-style taste begins.
Step 3: Add Ginger-Garlic Paste
Cook until raw smell disappears.
This removes mutton smell later.
Step 4: Add Spices and Bloom Them
Add:
- Turmeric
- Red chili powder
- Coriander powder
- Garam masala
Cook 30–40 seconds in oil.
This is called blooming.
It releases essential oils from spices.
Step 5: Add Marinated Mutton
Increase flame slightly.
Sear mutton for 5–7 minutes.
This step is critical.
Searing locks surface flavor and reduces raw smell.
Step 6: Water Ratio
Add enough hot water to just cover meat.
Too much water = thin gravy.
Too little water = burning.
Ideal ratio:
About 1 to 1.5 cups water for 500g mutton.
Step 7: Whistle Timing
Close lid.
Cook on medium-high until first whistle.
Then reduce to medium-low.
Cook:
- 4–6 whistles (tender goat meat)
- 6–8 whistles (harder mutton)
Turn off heat.
Let pressure release naturally.
Never force open immediately.
Step 8: Check Texture
Open and check.
If meat is still slightly firm:
Simmer uncovered 10–15 minutes more.
Do NOT increase heat aggressively.
Slow finishing gives soft result.
 |
| Rich and aromatic slow cooked mutton curry with soft tender goat meat. |
Important Reminder
If your mutton is hard:
It usually means:
- It needed more cooking time
- Or heat was too high
- Or cut was wrong
Not that your recipe failed.
Cooking mutton is patience.
Not speed.
How to Cook Tender Mutton Curry
Slow Cooking, Dhaba Secrets, Gravy Mastery & Mistake-Proof Guide
If you read above, you now understand something powerful:
Tender mutton is not luck.
It’s science + patience + correct technique.
In this part, we go deeper.
We’ll cover:
- Slow cooked mutton curry without pressure cooker
- Restaurant & dhaba style secrets
- Perfect gravy consistency guide
- Common mistakes while cooking mutton
- How to reduce mutton smell
- Beginner-friendly simplified method
- Storage and reheating tips
6️⃣ Slow Cooked Mutton Curry (Without Pressure Cooker)
Many people think pressure cooker is mandatory.
It’s not.
In fact, slow cooking gives even better texture if done correctly.
Stove-Top Slow Cooking Method
Step 1: Heavy Bottom Pot
Use thick kadai, Dutch oven, or heavy pan.
Thin vessels cause burning.
Step 2: Follow Same Base
- Heat oil
- Brown onions slowly
- Add ginger-garlic
- Bloom spices
- Sear mutton properly
Do NOT skip searing.
Searing builds deep flavor.
Step 3: Water & Flame Control
Add hot water just enough to cover meat.
Bring to boil once.
Then reduce to lowest flame.
Cover partially.
Let it cook gently for 60–90 minutes.
You should see:
Small bubbles.
Not aggressive boiling.
Why Slow Cooking Works
Remember collagen?
At low steady heat (90–95°C):
Collagen melts slowly into gelatin.
Result:
- Silky gravy
- Soft fibers
- Rich mouthfeel
If you boil aggressively, meat tightens.
Slow flame = soft texture.
Dutch Oven Method
If using oven:
- Preheat to 160–170°C
- Cook covered for 75–100 minutes
Check tenderness at 75 minutes.
Meat should easily break when pressed.
7️⃣ Restaurant & Dhaba Style Mutton Curry Secrets
Now comes the flavor magic.
Restaurants do 5 things differently.
1. Oil Layering
Home cooks fear oil.
Dhaba cooks don’t.
They use slightly more oil.
Oil carries spice flavor.
And helps gravy shine.
You don’t need excessive oil.
But don’t make it dry either.
2. Proper Spice Blooming
Spices must fry in oil.
Raw spice taste = flat curry.
Always cook powdered spices 30–40 seconds in oil before adding water.
3. Bhunao Technique
After adding mutton and masala:
Cook on medium until oil separates slightly.
This deep roasting step builds body.
Most beginners skip this.
That’s why curry tastes “home style” instead of “restaurant style”.
4. Balanced Gravy Thickness
Dhaba curry is never watery.
It is medium-thick.
It coats spoon lightly.
Too thick = heavy.
Too thin = bland.
We fix this in next section.
5. Finishing Fats
At the end, add:
- 1 tsp ghee
OR - Small knob butter
Turn off heat immediately.
This gives aroma boost.
8️⃣ Mutton Curry Gravy Mastery Guide
Let’s solve the biggest struggle.
How to Thicken Mutton Curry Gravy
If gravy is thin:
Option 1: Simmer uncovered 10–15 minutes.
Option 2: Mash few cooked mutton pieces into gravy.
Option 3: Add 1 tbsp cashew paste.
Never add flour.
It changes taste.
Onion Ratio Guide
For 500g mutton:
Use 2–3 medium onions.
Too little = thin gravy.
Too much = overly sweet gravy.
Golden brown onions give natural thickness.
Tomato Balance
Too much tomato makes curry sour.
For 500g mutton:
1–2 medium tomatoes are enough.
Cook tomatoes until oil separates.
Raw tomato taste ruins curry.
Mutton Curry Without Yogurt
If you don’t want yogurt:
Increase onions slightly.
Add 1 tbsp cashew paste for richness.
Or slow cook longer for natural gelatin thickness.
Works perfectly.
 |
| Crispy and flavorful fried mutton pieces cooked with traditional Indian spices. |
Minimal Ingredient Version (Home Style)
For beginners:
- Oil
- Onions
- Ginger-garlic
- Turmeric
- Red chili
- Coriander powder
- Salt
- Garam masala
That’s enough.
No need 15 spices.
Simplicity works.
9️⃣ Common Mistakes While Cooking Mutton
Let’s be honest.
These mistakes ruin texture.
❌ Cooking on High Heat
High heat tightens meat.
Always reduce flame after boil.
❌ Not Cooking Long Enough
Undercooked mutton = chewy.
If hard, cook longer on low flame.
Do not panic.
❌ Adding Too Much Water
Dilutes flavor.
Add just enough to cover.
❌ Wrong Cut Selection
Very lean pieces stay firm.
Choose shoulder or rib cuts.
❌ Adding Salt Too Early (Excess)
Moderate salt during marination.
Adjust later.
🔟 How to Reduce Mutton Smell While Cooking
This is common fear.
Let’s clear myths.
Washing Myth
Washing 5–6 times does NOT remove smell.
It only spreads bacteria.
Wash once gently.
Drain properly.
Vinegar vs Turmeric
Light turmeric + salt rub helps slightly.
Vinegar can reduce smell but may change flavor.
Best solution?
Proper searing.
Proper Searing Secret
When you add mutton to hot masala:
Cook 5–7 minutes before adding water.
That initial roasting removes raw smell.
And builds flavor.
1️⃣1️⃣ Beginner’s Simple Mutton Curry
If you’re cooking first time:
Keep it basic.
- Heat oil
- Brown onions
- Add ginger-garlic
- Add spices
- Add mutton
- Add water
- Pressure cook 5–6 whistles
- Simmer 10 minutes
That’s it.
Do not overcomplicate. Confidence matters.
👨🍳 Expert Tips
- Always use fresh mutton whenever possible.
- Brown the onions patiently to develop a rich, flavorful gravy.
- Use hot water instead of cold water while cooking.
- Avoid cooking on high heat after the first boil.
- Finish the curry with a teaspoon of ghee and freshly chopped coriander for extra aroma.
- Allow the curry to rest for 10–15 minutes before serving for even better flavor.
1️⃣2️⃣ Mutton Curry Storage & Reheating Guide
Many people don’t know this:
Mutton curry tastes better next day.
How to Store
Cool completely.
Store in airtight container.
Refrigerate up to 3 days.
Freezing Method
Freeze in portion boxes.
Stays good for 1–2 months.
Thaw overnight in fridge.
Reheating Without Drying
Add 2–3 tbsp hot water.
Reheat on low flame.
Cover while reheating.
Do not microwave on high power.
Slow reheating keeps meat soft.
Final Thoughts
Cooking tender mutton curry is not complicated.
It’s about:
- Choosing right cut
- Cooking at correct temperature
- Giving it enough time
- Not rushing
If your mutton ever turns hard again, don’t feel discouraged.
It’s usually fixable. Just simmer longer. Low heat. Patience. And trust the process.
FAQ
Why is my mutton still hard after pressure cooking?
Usually because it needs more cooking time or the meat came from an older animal.
How many whistles for soft mutton curry?
Generally 4–6 whistles for goat meat and 6–8 whistles for tougher cuts.
Does yogurt make mutton tender?
Yes. Yogurt contains mild acids that help break down muscle fibers during marination.
Can I cook mutton without a pressure cooker?
Yes. Slow cook on low heat for 60–90 minutes.
Which cut of mutton is best for curry?
Shoulder and rib cuts are usually the most tender and flavorful.
Can I cook frozen mutton directly for curry?
It is best to thaw the mutton completely before cooking. This helps it cook evenly and results in a more tender texture.
Should I wash mutton before marinating?
A quick rinse is enough if needed. Pat the meat dry before marinating so the spices coat the surface evenly.
Can I make mutton curry a day ahead?
Yes. In fact, the flavors become even richer after resting overnight in the refrigerator.
Why is my mutton curry watery?
This usually happens when too much water is added. Simmer the curry uncovered until the gravy reaches your desired consistency.
Which oil is best for mutton curry?
Mustard oil, sunflower oil, and groundnut oil all work well. For extra richness, finish the curry with a teaspoon of ghee before serving.