

Andhra Mutton Fry, also known as Mamsam Vepudu, is a spicy South Indian dish made with tender mutton, onions, curry leaves, green chillies, and a bold blend of ground spices. Unlike a traditional mutton curry, this preparation finishes with a thick masala coating rather than a bowl of gravy.
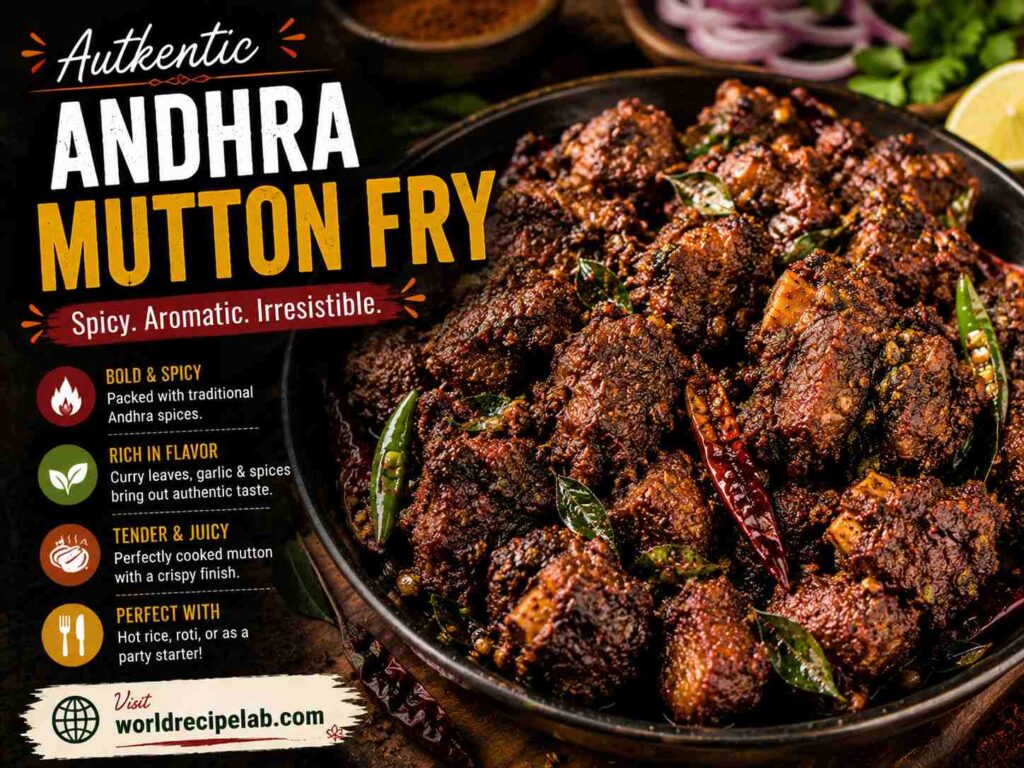
The method is straightforward: pressure-cook the mutton until tender, prepare an onion and spice base, and fry the cooked meat until the masala clings to the pieces. Red chilli powder provides the heat, while curry leaves, ginger-garlic paste, and a final touch of ghee add aroma and depth.
Serve Andhra Mutton Fry with steamed rice and rasam, or enjoy it with chapati or jowar roti. You can also serve smaller portions as a spicy starter.
Wash and drain the mutton, then place it in a pressure cooker. Add turmeric powder, salt, and 1 cup of water.
Secure the lid and cook according to your pressure cooker's instructions until the meat is tender. The time required depends on the cut, the size of the pieces, and the cooker. Four to five whistles may be a useful starting point in some stovetop pressure cookers, but whistles alone do not guarantee tenderness.
Allow the pressure to release naturally before opening the cooker according to the manufacturer's instructions.
Check the meat. If it is still tough, pressure-cook it for longer with sufficient liquid. Reserve the cooking stock for the next step.
Heat the oil in a wide, heavy-bottomed kadai over medium heat.
Add the chopped onions and sauté until golden brown. Add the curry leaves and slit green chillies, taking care because fresh curry leaves may splutter when they meet hot oil.
Stir in the ginger-garlic paste and cook until its raw aroma disappears.
Reduce the heat to low before adding the red chilli powder and coriander powder. Stir briefly so the spices release their aroma without burning.
If the pan looks dry, add a small splash of the reserved mutton stock. Mix thoroughly to form a thick masala.
Taste before adding more salt because the mutton was already seasoned during pressure-cooking.
Transfer the tender mutton pieces to the kadai. Mix carefully to coat them with the onion and spice mixture.
Add a little reserved stock if needed to help the masala coat the meat. Avoid adding too much at once; the goal is a thick coating rather than a watery gravy.
Cook over medium heat for approximately 10–15 minutes, stirring occasionally so the meat browns without sticking.
As the moisture evaporates, the masala should become thicker and cling to the mutton. Allow some pieces to develop lightly browned edges, but avoid scorching the spices.
If the meat begins sticking before the masala has cooked properly, lower the heat and add a tablespoon or two of stock as needed.
Sprinkle in the garam masala and mix well. Add chopped coriander leaves and the optional tablespoon of ghee.
Turn off the heat and finish with a few drops of lime juice if you prefer a brighter flavour.
Taste and adjust the salt or chilli level before serving.
Transfer the Andhra Mutton Fry to a serving dish and garnish with additional coriander if desired.
Serve with steamed rice, rasam, chapati, phulka, or jowar roti. Sliced onions and lemon or lime wedges make useful accompaniments.
Andhra-style mutton fry is known for its bold seasoning and concentrated masala. Unlike a gravy-based mutton curry, the finished dish contains little free liquid.
Three elements help create its characteristic flavour:
Bone-in mutton adds flavour to the cooking stock, while pressure-cooking helps tenderise the meat before the final fry.
If you enjoy dry-style meat dishes, try this Dry Mutton Fry recipe. For a different regional preparation, explore Kerala Mutton Ghee Roast.
Bone-in mutton is a good choice for flavour, but boneless mutton also works. Cut it into evenly sized pieces and adjust the pressure-cooking time to suit the cut.
Groundnut oil is a useful choice for this style of cooking. Sunflower oil works well too. Gingelly oil can add a distinctive sesame flavour, so use it according to your preference.
Reduce the quantity for a milder fry. You can replace part of the hot chilli powder with Kashmiri chilli powder for colour and a gentler heat, although the exact result depends on the product.
Use fewer green chillies if you prefer a milder dish. Removing the seeds may reduce some of their heat, but it will not eliminate it completely.
Ghee adds richness and aroma at the end. If you prefer not to use it, finish with a little of the cooking oil instead.
A small pinch of fennel seeds can be added to the hot oil before the onions. They provide a gentle sweetness and an additional aromatic note, but they are optional.
Lime juice brightens the finished dish. Add it sparingly after cooking so its acidity complements rather than overwhelms the spice mixture.
The final frying stage is designed to build flavour and coat the meat with masala. It is not a substitute for properly cooking and tenderising the mutton.
Golden-brown onions provide much of the dish's savoury depth. Pale onions produce a milder, less developed masala, while burnt onions can make the dish bitter.
Red chilli powder can scorch quickly in very hot oil. Lower the heat before adding the spices and use a splash of stock if necessary.
A wide pan allows moisture to evaporate and gives the meat more contact with the cooking surface. If your pan is small, finish the mutton in batches.
Add reserved stock a little at a time. Too much liquid can turn the dry fry into a curry, while too little can cause the masala to burn before it coats the meat.
A few drops of lime juice can balance the rich, spicy masala. Add it gradually and taste as you go.
Andhra Mutton Fry works well with both rice-based meals and flatbreads.
For another spicy regional dish, try Chettinad Mutton Curry. If you prefer a creamy preparation, explore Mutton Korma.
Transfer leftover mutton fry to a shallow, airtight container and refrigerate promptly. Do not leave cooked meat at room temperature for more than two hours, or one hour when the surrounding temperature exceeds 32°C (90°F).
Refrigerate at 4°C (40°F) or below and use within three to four days.
Yes. Divide the cooled dish into meal-sized portions and freeze in suitable airtight containers. For best quality, use within two to three months.
Thaw frozen portions in the refrigerator rather than on the kitchen counter.
You can also reheat it in a microwave-safe container, covered loosely to retain moisture. Stir partway through and check that it is hot throughout.
Yes, but chicken requires different cooking times. Do not use the mutton pressure-cooking instructions or assume that one or two whistles will be appropriate for every cooker and cut.
Cook chicken until it reaches an internal temperature of 74°C (165°F), measured at the thickest part away from bone. Then finish it with the prepared masala.
Groundnut oil is a good choice because its flavour suits the dish and it works well for frying. Sunflower oil is a practical alternative. Gingelly oil offers a more pronounced sesame flavour.
It is generally served as a dry-style preparation, with masala clinging to the meat rather than a pool of gravy. You can leave it slightly moist if you prefer, but reduce most of the excess stock during the final frying stage.
This version is moderately to very spicy, depending on the chilli powder and green chillies used. Reduce the chilli powder for a milder dish or use a combination of hot and mild chilli powders.
Yes. You can pressure-cook the mutton and refrigerate it separately from the masala. Cool and refrigerate both promptly, then finish frying the meat shortly before serving.
Alternatively, prepare the complete dish in advance, refrigerate it safely, and reheat thoroughly when needed.
The meat or pressure-cooking stock may have released more moisture than expected. Cook uncovered over medium heat, stirring regularly, until the excess liquid evaporates and the masala clings to the meat.
The meat may not have been pressure-cooked long enough, or the cut may require more time to tenderise. Return the meat to the pressure cooker with sufficient liquid and continue cooking according to your cooker's instructions.
Andhra Mutton Fry brings together tender mutton, golden onions, curry leaves, and a bold chilli masala in a dry-style South Indian preparation.
The key is to tenderise the meat before frying, cook the spices without burning them, and reduce the reserved stock gradually until the masala coats each piece.
Serve it hot with rice and rasam or your favourite flatbread. Adjust the chilli to suit your taste, and finish with coriander and a little lime juice for a balanced, flavourful dish.
For more regional ideas, browse our collection of the best mutton recipes to make at home.
• Bone-in mutton provides deeper flavor, but boneless meat can also be used.
• Groundnut oil or gingelly oil gives the most authentic Andhra taste.
• Fresh curry leaves are essential and should not be skipped.
• A pinch of fennel seeds can be added while frying the onions for extra aroma.
• For a smokier finish, dry roast a few red chilies and crush them over the cooked mutton.
• If the dish becomes too dry while reheating, add a splash of reserved stock or water.
• Store leftovers in an airtight container in the refrigerator for up to 3 days.
• For freezing, divide into portions and use within 2 weeks.
• Traditionally served with hot rice, pappu, rasam, jowar roti, or spicy chutneys.